Home Studio Setup FAQ: Answers to Common Mistakes
Contact partnership@freebeat.ai for guest post/link insertion opportunities.
You sit down to record and something feels “off.” The vocal sounds boxy, your mixes don’t translate to the car, and there’s always a mystery buzz the moment you hit record. I’ve built more than one home studio setup in spare bedrooms and apartments, and the pattern is consistent: it’s rarely one big mistake—it’s a few small ones stacked. This guide answers the most common questions and fixes the errors that quietly ruin sound.
What is needed to set up a home studio? (The real essentials)
A reliable home studio setup is a chain: room → monitoring → capture → workflow. If one link is weak, you’ll waste time “fixing it in the mix.” At minimum, you need a computer, a DAW, an audio interface, monitoring (headphones and/or studio monitors), and at least one microphone (or instrument input) with proper cables.
Here’s the practical starter list I recommend for most creators:
- Computer with enough RAM/CPU headroom for your DAW and plugins
- DAW (recording software): Logic, Ableton, FL Studio, Reaper, etc.
- Audio interface with stable drivers and clean preamps
- Closed-back headphones for recording + (optional) open-back for mixing
- Microphone matched to your room (dynamic often wins in untreated rooms)
- Mic stand + pop filter, plus XLR cable you trust
- Basic acoustic treatment (not just foam) where it matters most
Industry guidance consistently emphasizes investing in the key components (interface, mic, computer) and avoiding ultra-cheap cables and accessories that fail early and add noise (Tracklib).
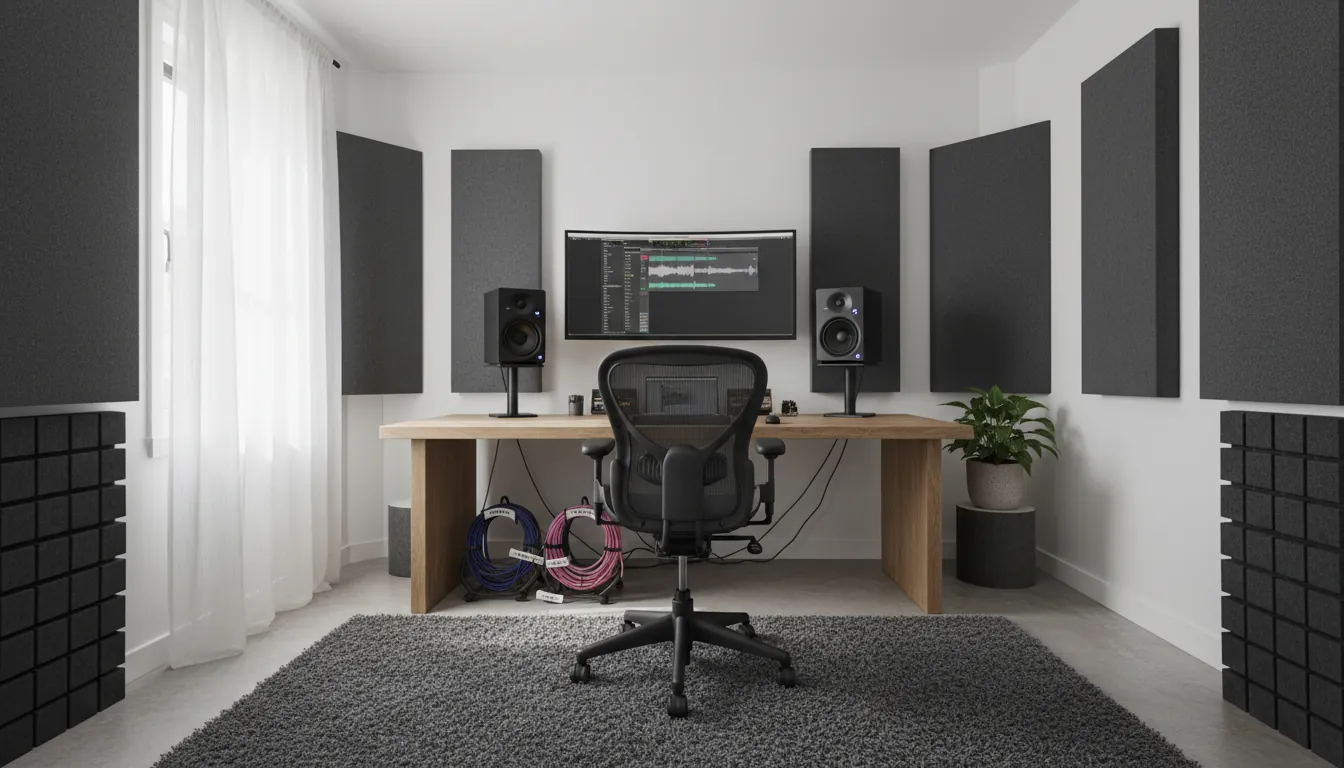
How to set up a studio in your house (step-by-step, no fluff)
Most people start by buying gear, then wonder why it still sounds amateur. Start with the room and layout first; it’s cheaper and it works.
- Choose the quietest room you can control
- A spare bedroom beats a living room. Avoid low ceilings and perfectly square rooms when possible; they exaggerate reflections and muddiness (Audient).
- Orient your desk on the short wall
- This often improves symmetry and stereo imaging, which matters for mixing decisions.
- Place monitors correctly (if you use them)
- Set tweeters at ear level and form an equilateral triangle with your head. Keep speakers out of corners to reduce bass buildup (Abbey Road).
- Treat reflections before you chase plugins
- Start with first reflection points and corners (bass). Reflections cause issues like comb filtering—peaks and notches that trick your ears (Abbey Road).
- Set gain staging and a repeatable template
- Create a DAW template with your inputs, headphone mix, and a simple vocal chain. The best home studio setup is the one you can operate fast.
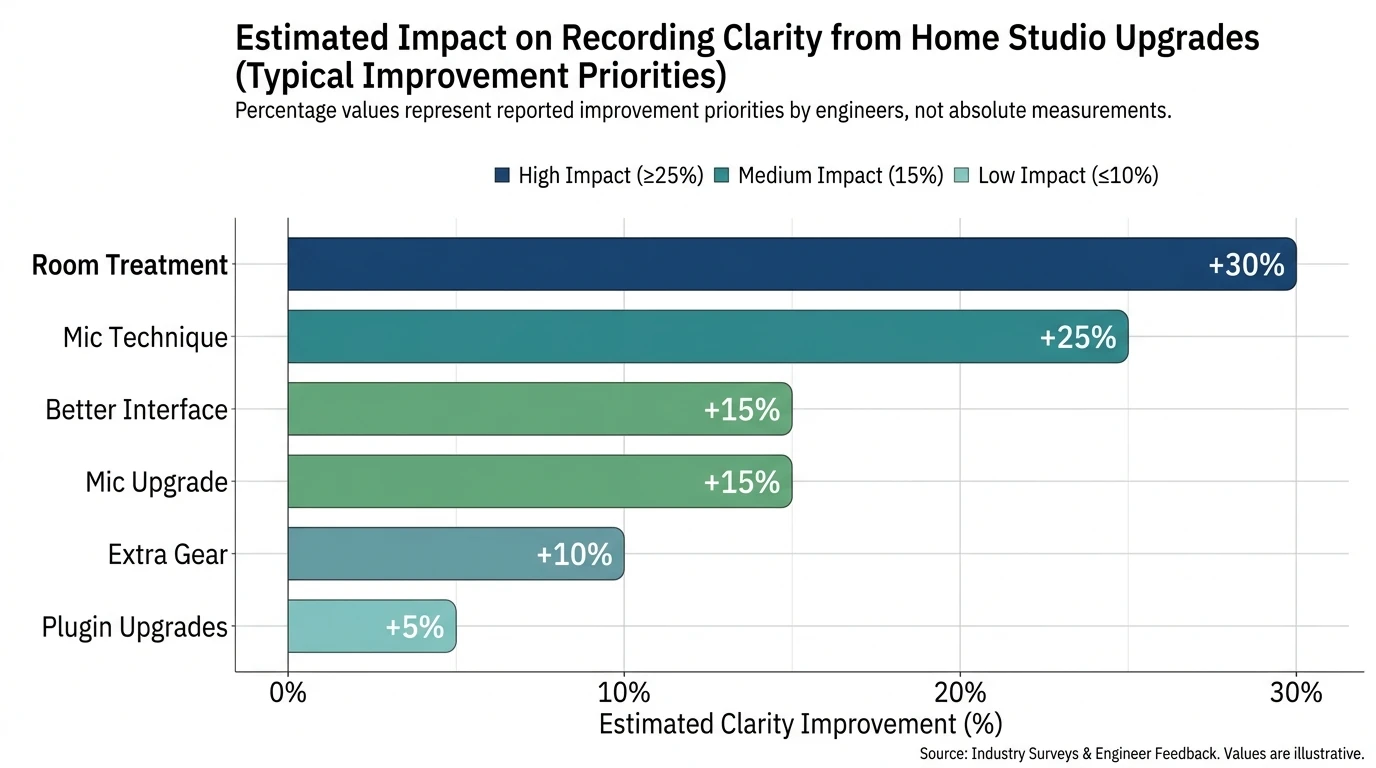
Common home studio build mistakes (and how to fix them)
Mistake 1: Buying “more gear” instead of better signal flow
I did this early on—three budget mics, two cheap interfaces, and still bad results. The fix was boring: one stable interface, one dependable mic, and proper monitoring. Quality beats quantity, and it’s cheaper over a year.
Fix checklist
- Prioritize: interface → mic → headphones/monitors → treatment
- Don’t cheap out on XLR cables and stands; failures kill sessions (Tracklib)
Mistake 2: Confusing soundproofing with acoustic treatment
Soundproofing blocks noise in/out. Acoustic treatment controls reflections inside the room. Many home studio setup issues are reflection problems, not “thin walls.”
Fix checklist
- Acoustic treatment: absorption (panels), bass traps, limited diffusion
- Noise control: seal gaps, manage HVAC, reduce computer fan noise
Mistake 3: Ignoring low-frequency (bass) problems
Bass is the hardest part in small rooms. If you only add thin foam, your highs get dull while bass stays messy. Many acoustic pros call out low-frequency control as the most skipped step (Acoustic Sound Products).
Fix checklist
- Add bass traps in corners first
- Use thicker panels (or dense materials) at key reflection points
- Test, move, retest—don’t “set and forget”
Mistake 4: Bad monitor placement (then “fixing” mixes with EQ)
If your speakers are too low, too wide, or against a wall, your decisions will be wrong. Abbey Road’s beginner guidance is simple and correct: tweeters at ear level, triangle positioning, minimize hard reflections (Abbey Road).
Fix checklist
- Ear-level tweeters
- Equilateral triangle listening position
- Symmetry left/right as much as your room allows
- Pull monitors away from walls when possible
Mistake 5: Relying on post-production to fix a weak performance
This one hurts because it’s not “technical.” But it’s real: editing can’t rescue lifeless takes. One advantage of a home studio setup is unlimited time—use it to capture better performances (Tracklib).
Fix checklist
- Record multiple full passes, not endless punch-ins
- Track when you’re fresh; stop when you’re chasing your tail
- Keep monitoring comfortable to avoid strained takes
Gear FAQs: what to buy (without wasting money)
Audio interface: what matters?
You’re buying stable drivers, low latency, and clean preamps. Cheap interfaces can cause noise and workflow pain you can’t “mix away.” Make sure the interface matches your computer ports (USB/Thunderbolt) and you have enough inputs for your goals (iZotope).
Microphone: condenser or dynamic for a home studio setup?
If your room is untreated or noisy, a dynamic mic is often the smarter first buy because it rejects more room sound. Condensers can sound amazing, but they also “tell the truth” about reflections, HVAC, and street noise.
What software do I need for a home studio?
At minimum:
- DAW (recording + mixing)
- Audio interface driver/control app
- Basic plugins: EQ, compressor, limiter, de-esser, reverb
- Backup/storage plan (external drive is a common best practice)
Quick comparison: starter home studio setup paths
What does 4 hours of studio time cost—and when does home win?
Commercial studios vary widely, but half-day sessions (4–6 hours) commonly start around $120–$500 and can reach $1,500+ in high-end rooms (as in the reference range you provided). A home studio setup pays off when you record often, iterate fast, or need flexibility for vocals, overdubs, and content.
A practical way to decide:
- If you record once a month, rent time for drums/live rooms and build a modest home rig.
- If you record every week, invest in your home chain (interface, mic, treatment) and outsource only what needs a big room.
Troubleshooting: the fastest fixes for noisy, laggy sessions
When I’m diagnosing a home rig, I start with these because they solve most “mystery” problems:
- Hum/buzz: use balanced cables, separate audio from power runs, check ground loops
- Latency: lower buffer size while tracking; use direct monitoring if your interface supports it
- Phase weirdness (multi-mic): flip polarity or adjust mic distances
- Harsh/boxy vocals: change position in room, add absorption behind/next to the mic, reduce reflections
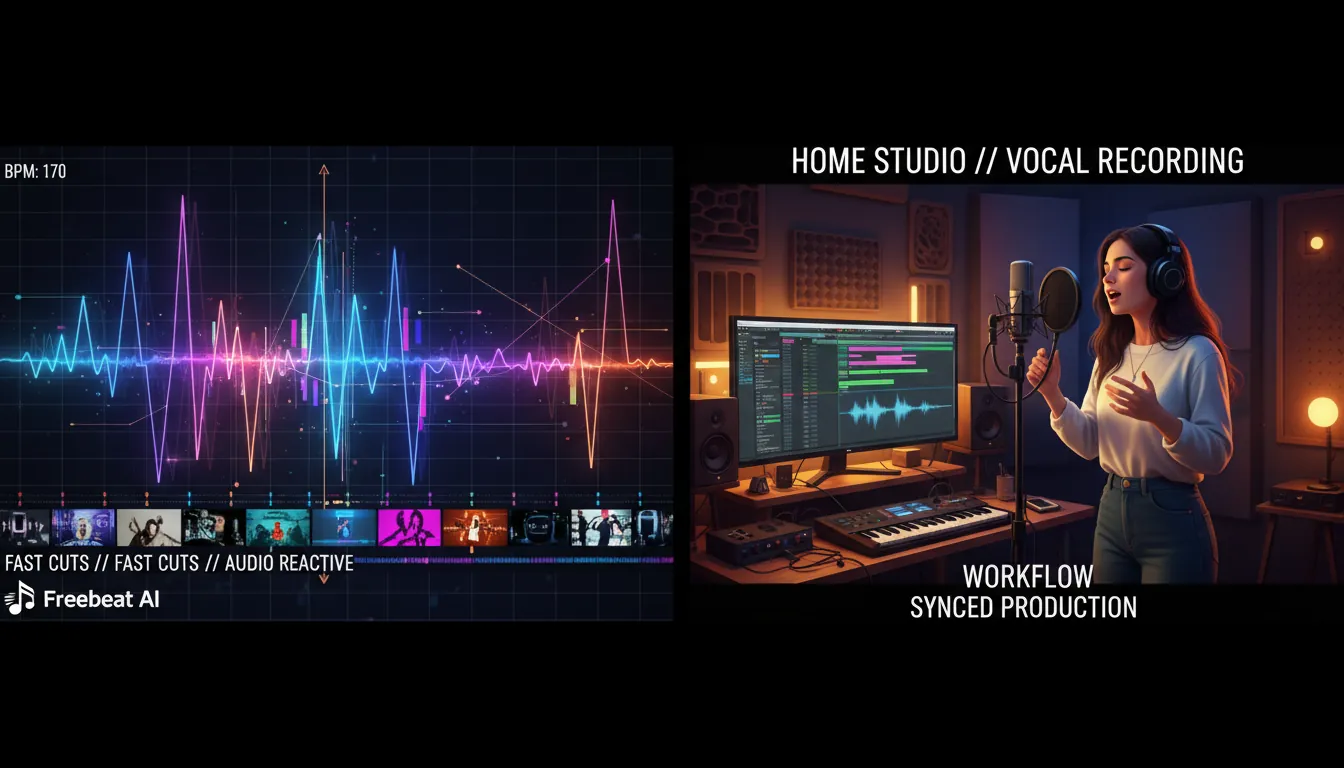
Turn your home studio setup into a content engine (Freebeat AI workflow)
Once your audio is clean, the next bottleneck is publishing—especially for musicians who need frequent visuals. This is where Freebeat AI fits naturally into a modern home studio setup: you create the track at home, then generate music-driven videos that follow BPM, drops, and sections without manual keyframing.
A simple, repeatable pipeline:
- Export your mix (or even a demo bounce) from your DAW
- Generate an audio-reactive video that matches the song’s structure (verses, choruses, drops)
- Reuse a consistent avatar/visual identity so your channel looks recognizable
- Publish variations: performance-style, storytelling, lyric video cuts
Helpful next steps:
- Explore Freebeat AI’s music-driven video creation platform for audio-reactive generation
- See how creators use structure-aware edits in the Freebeat AI blog
- If you’re building a repeatable visual identity, start with the Freebeat AI avatar workflow
Acoustic Treatment for Beginners: Studio Sound Optimization
Conclusion: the home studio setup that keeps you creating
A solid home studio setup isn’t the most expensive one—it’s the one that removes friction. When your room is under control, your monitoring is honest, and your recording chain is stable, you stop fighting problems and start finishing songs. And when you’re ready to ship those songs as videos, tools like Freebeat AI can turn your audio into platform-ready visuals without turning your life into an editing marathon.
📌 avoiding low quality ai slop how to use freebeat ai wisely
FAQ (People Also Ask)
1) What is needed to set up a home studio?
A computer, DAW, audio interface, headphones/monitors, a mic (or instrument input), cables/stands, and basic acoustic treatment.
2) How to set up a studio in your house?
Pick the quietest room, orient the desk on the short wall, place monitors in an equilateral triangle at ear level, treat reflections and bass, then build a repeatable DAW template.
3) What are common studio build mistakes?
Skipping acoustic treatment, placing monitors poorly, buying lots of cheap gear, confusing soundproofing with treatment, and relying on post to fix weak takes.
4) What software do I need for a home studio?
A DAW, interface drivers/control software, essential plugins (EQ/compression/limiting), and a backup/storage plan.
5) How much is 4 hours of studio time?
Half-day sessions often range from about $120 to $500, with premium rooms reaching $1,500+ depending on location, gear, and reputation.
6) Should I buy studio monitors or headphones first?
If your room is untreated, start with good closed-back headphones for recording. Add monitors after you can treat reflections and bass, or you’ll chase bad mix decisions.
7) Do I need acoustic foam?
Foam can help tame some high-frequency reflections, but it rarely solves bass or overall balance. Prioritize thicker panels and bass traps where possible.


