Home Recording Studio Setup: Gear Checklist for 2026
Contact partnership@freebeat.ai for guest post/link insertion opportunities.
A home recording studio setup can feel like a puzzle: you want pro sound, but you’re working with real-life constraints like a spare bedroom, noisy streets, and a budget that has to make sense. I’ve built and rebuilt small-room rigs for vocals, beat-making, and client demos, and the biggest lesson is simple: your room and signal chain matter more than “fancier” plugins. The good news is that in 2026, reliable interfaces, quiet mics, and smart room-correction tools make a home recording studio setup far easier to dial in than even a few years ago. So what should you buy first, and what can wait?
Step 1: Pick the right room (before you buy anything)
Your home recording studio setup starts with the space, not the shopping cart. Choose the quietest room you have, ideally away from traffic, HVAC rumble, and shared walls. If you can, set up facing the short wall so sound travels down the longer dimension, which often improves low-end smoothness.
A practical baseline that works in most homes:
- Put your desk centered on the short wall.
- Keep your listening position about 35–40% into the room (not dead center).
- Leave some breathing room behind monitors and your chair when possible.
Step 2: Build the “core chain” (the minimum gear that actually records)
If you’re asking, “What is needed to set up a home recording studio?”—this is the core. In my experience, the fastest path is: computer → interface → mic → headphones, plus basic treatment so your recordings don’t sound like they’re in a closet (or a gym).
Core gear checklist (2026-ready)
- Computer: prioritize CPU + RAM + SSD
- 16GB RAM minimum, 32GB recommended, 64GB ideal for huge sample libraries (common 2026 guidance).
- SSD storage matters because modern sessions with stems and AI tools can get large fast.
- DAW (recording software): Logic, Ableton, Pro Tools, Reaper, Studio One, etc. Pick the one you’ll actually learn.
- Audio interface (your sound card + mic preamps): look for stable drivers, low latency, and enough inputs for your needs.
- Microphone: choose based on your room and source (more on this below).
- Headphones: closed-back for tracking; open-back is great for mixing if your environment allows.
- Cables + stand + pop filter: unglamorous, but they prevent noisy headaches and bad takes.
Step 3: Choose an audio interface that won’t fight you
In 2026, “budget interfaces” can sound genuinely clean. The bigger differences are workflow features (metering, loopback), driver stability, and I/O. Many reviewers still rank the Focusrite Scarlett 2i2 (4th gen) highly for home studios; it’s widely used for a reason (sound + usability). For a deeper rundown of current picks, see MusicRadar’s best audio interfaces.
What I look for when setting up a home recording studio setup for vocals and content:
- USB-C/Thunderbolt connectivity for low-latency tracking
- 48V phantom power (required for most condenser mics)
- Enough clean gain if you’ll use low-output dynamics (common with broadcast-style mics)
- Loopback if you stream, teach, or capture system audio
Step 4: Pick a mic that matches your room (not your fantasy studio)
This is where most home studios overspend—or buy the wrong type.
Condenser vs dynamic (quick decision rule)
- Condenser mic: detailed, airy vocals—but will capture more room sound.
- Dynamic mic: less sensitive, often better in untreated/noisy rooms.
I’ve recorded strong “release-ready” vocal takes in imperfect rooms using a dynamic mic specifically because it rejected more of the space. That’s why models like the Shure SM7B-style dynamics are often recommended for home environments, while condensers shine once your room is controlled. For general guidance, MusicRadar’s vocal mic recommendations align with this approach.
Practical 2026 picks by situation
- Untreated room / background noise: dynamic vocal mic
- Treated room / controlled reflections: condenser vocal mic (often clearer “studio” sheen)
- One-mic-fits-most: a versatile condenser + solid pop control + consistent mic distance
Step 5: Don’t “soundproof” first—treat reflections first
People ask, “Can you have a recording studio in your house?” Absolutely—most modern creators do. The trick is to separate soundproofing (blocking noise in/out, expensive) from acoustic treatment (reducing echo and reflections, affordable).
Start with treatment that improves both recording and mixing:
- Early reflection control (panels at the side walls and ceiling “cloud” points)
- Bass traps in corners (low end builds up there)
- Add more incrementally so you don’t over-deaden the room
If you want a solid primer on why reflection points and calibration matter, Sonarworks’ home-studio guidance is a useful reference: Sonarworks home studio checklist.
Step 6: Place monitors and set listening geometry (small-room friendly)
If you’re mixing on speakers, placement can beat “better monitors” in a bad spot. Use the classic nearfield layout:
- Tweeters at ear height
- Speakers and your head form an equilateral triangle
- Keep monitors symmetric left/right
- Avoid pushing monitors deep into corners
If you can’t use monitors (roommates, thin walls), a headphone-first workflow is still valid—just be consistent and reference mixes on multiple systems.
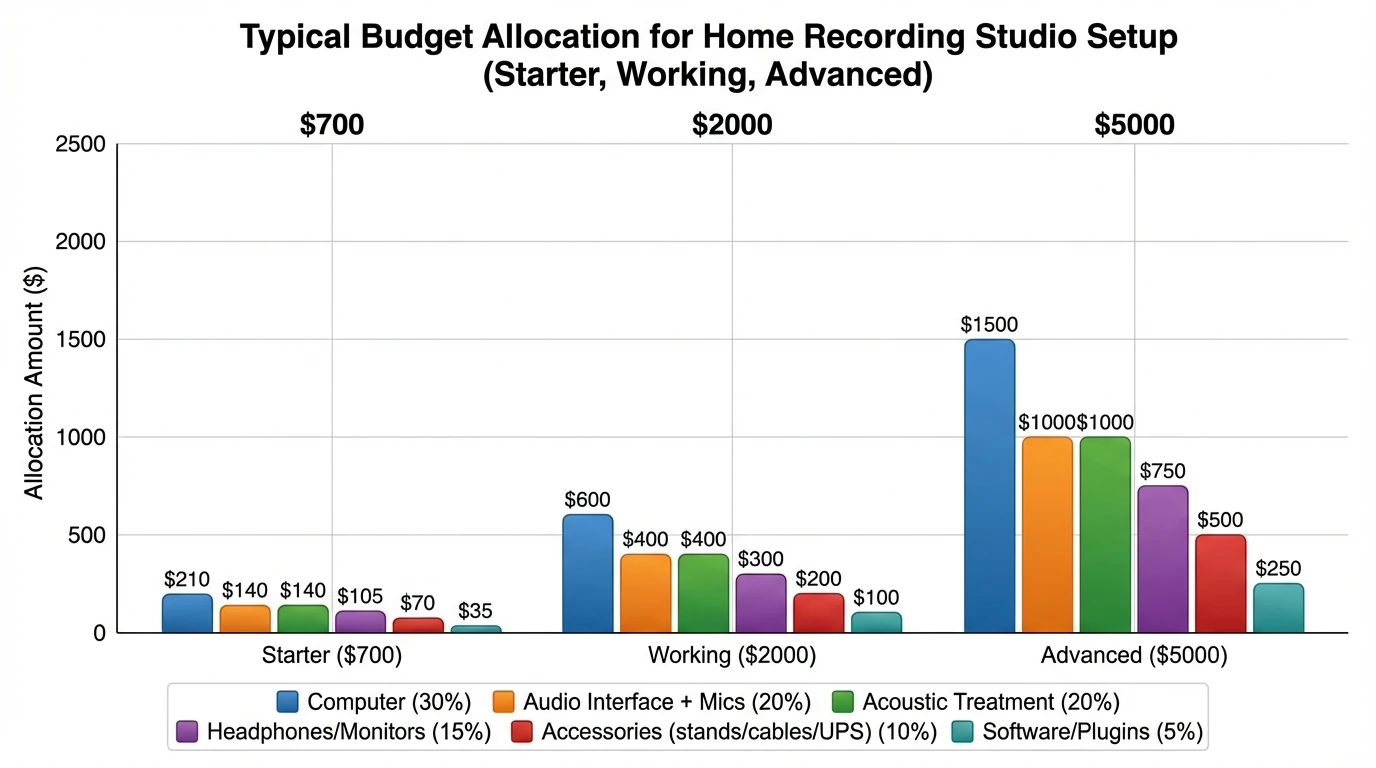
Step 7: Plan your budget with honest tiers (and what you can do with each)
A common question is, “How much does it cost to build a recording studio in your house?” In 2026, you can get real results without going broke. Here’s a practical tiering based on typical, proven home builds.
Reality check on paid studios: If local studio time is ~$35/hour, then 3 hours can be ~$105 (often more with an engineer). A solid home recording studio setup can pay for itself quickly if you record weekly, and it’s always available when inspiration hits.
Step 8: Avoid the build mistakes that ruin takes
Most home-studio problems are not “mystery audio issues”—they’re repeatable mistakes. Here’s the short list I see (and have personally made early on):
- Recording in a bare, echoey room (fix reflections first)
- Turning input gain too high (clipping or harshness)
- Bad mic distance (inconsistent tone + dynamics)
- No pop filter (plosives that are hard to repair)
- Playing backing tracks through speakers while tracking vocals (bleed)
- Ignoring gain staging and monitoring level consistency
- Printing heavy effects while recording (commit only when you’re sure)
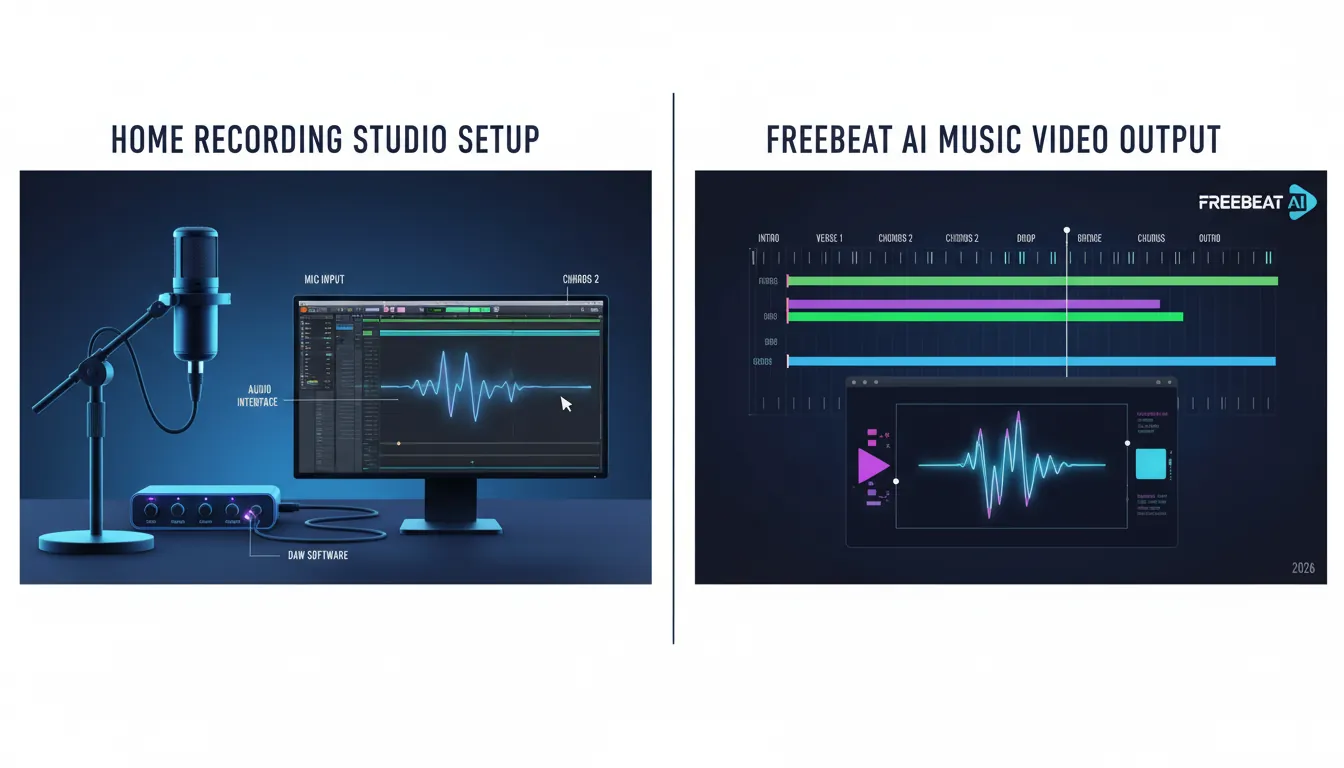
Step 9: Make your setup creator-ready (record audio → ship video)
In 2026, your home recording studio setup isn’t just for audio—it’s your content engine. Once your track is recorded, you can turn it into short-form clips, lyric videos, dance edits, or full music videos without living inside a timeline editor.
This is where Freebeat AI fits naturally: it’s designed for music-driven, audio-reactive video generation, syncing visuals to BPM, sections, drops, and energy changes. I tested this workflow on a chorus/verse structure track and found the biggest win wasn’t “pretty visuals”—it was pacing that actually matched the song, which is what most quick generators miss.
A practical pipeline:
- Record clean vocals/instruments in your home studio
- Export a mix or bounce stems (optional)
- Generate platform-ready visuals that follow your song’s structure
If I Set Up My First Home Recording Studio in 2026, I’d Do This (Simple + Affordable)
Quick “Gear Checklist for 2026” (printable)
Use this to sanity-check your home recording studio setup before you buy upgrades.
Must-have (start here)
- Computer with SSD + 16–32GB RAM
- DAW
- 2-in/2-out audio interface
- 1 good mic (matched to room)
- Closed-back headphones
- Mic stand, XLR cable, pop filter
- Basic treatment (reflection points + corners)
Nice-to-have (next upgrades)
- Studio monitors + isolation stands
- Room correction software
- Open-back mixing headphones
- UPS + cable management + external backup drive
Expand when needed
- 4–8 input interface for multi-mic sessions (drums, bands)
- Additional mics (dynamic + condenser options)
- Outboard preamp (only after room and mic are handled)
Conclusion: A home studio that actually gets used
A great home recording studio setup isn’t the most expensive one—it’s the one that removes friction so you can hit record daily. Start with the room, build a clean core chain, treat reflections, then upgrade based on specific limitations you can name. When your audio is consistent, you can scale your output into visuals and promos fast—especially if you’re using a music-aware tool like Freebeat AI to turn finished tracks into synced videos without a full editing grind.
📌 how freebeat ai helps you match your songs mood with ai generated cover art
FAQ: Home Recording Studio Setup (2026)
1) What is needed to set up a home recording studio?
At minimum: a computer, DAW, audio interface, microphone, closed-back headphones, and basic acoustic treatment. Add monitors later if your room and neighbors allow.
2) How much does it cost to build a recording studio in your house?
A workable starter build often lands around $500–$800, while a serious “working” setup is commonly $1,500–$2,500. The room (and how you treat it) determines how far your money goes.
3) Can you have a recording studio in your house?
Yes. Most modern records and content workflows begin at home; focus on reflection control and noise management rather than trying to fully soundproof.
4) How much is 3 hours of studio time?
Rates vary widely, but some studios start around $35/hour, so 3 hours can be about $105 (often more with an engineer or premium rooms).
5) Do I need 128GB of RAM for music production in 2026?
Usually no. 16GB is a minimum, 32GB is recommended for most producers, and 64GB is ideal for large orchestral templates and heavy sample use.
6) What are common home studio build mistakes?
Recording in a bare room, clipping inputs, bad mic placement, no pop filter, and monitoring too loud. Treat early reflections and practice gain staging to fix most issues.
7) Should I buy studio monitors or headphones first?
Headphones first (closed-back) are usually the safest early purchase. Add monitors when you can place them properly and treat the room enough to trust what you hear.
Authoritative resources referenced: MusicRadar’s best audio interfaces, MusicRadar’s best vocal mics, Sonarworks home studio checklist.


